My techniques for the indoor cultivation and propagation of Heliamphora.
My techniques for the indoor cultivation of Heliamphora
Originally publised in the December, 2013 issue of ICPS's Canivorous Plant Newsletter.
Until recently the indoor cultivation techniques of Heliamphora consisted mainly of tribal
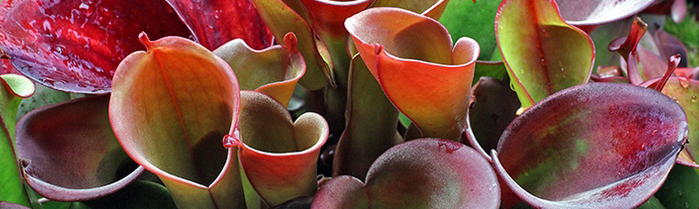
knowledge amongst hobbyists. Such information had the new grower overly apprehensive of growing
some of the most beautiful of carnivorous plants (Fig. 1 & Front Cover).
Over the last few years cultivation techniques have been refined to the point where Heliamphoraare no longer considered so difficult. With just a minimal investment, not only can they be grown, but also grown well. To be successful long term you must keep their conditions cool, bright, and
humid.
The techniques I am about to describe are by no means the only successful method. Many growers
use techniques different than mine. The following methods are what I have found work best for me through experimentation, trial and error, as well as extensive research.
Substrate
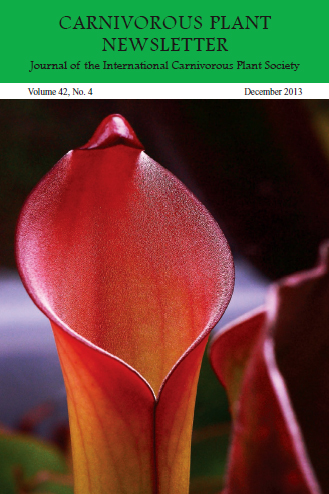
Over the years I have tried many media mixes including: pure cypress bark, pure Sphagnum,and my current blend of Aquatic Plant Soil (APS), perlite, and long-fibered Sphagnum moss (Fig.2). Some of my best growth has been with cypress-based mixes. I found that these particular mixes also have their disadvantages. One was that the cypress mixes consisted of voids that small, fragile divisions had trouble rooting into. The roots would hit a chunk of cypress and start circling in on itself. Secondly, the cypress-based mixes required extensive watering. At one point I was watering several times a day.After much experimentation, I have finally settled on a 1:1:1 mix of Aquatic Plant Soil, perlite, and long-fibered Sphagnum. This mix has proven to be an excellent performer. The APS is an excellent moisture buffer.
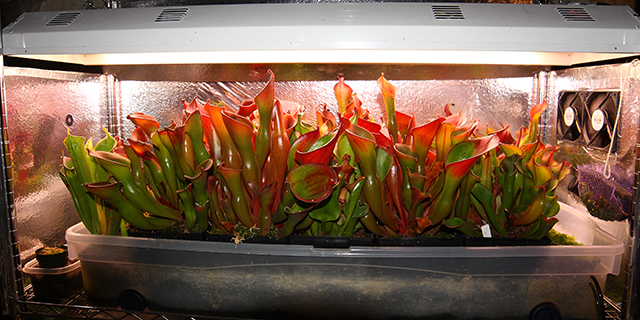
fig. 1
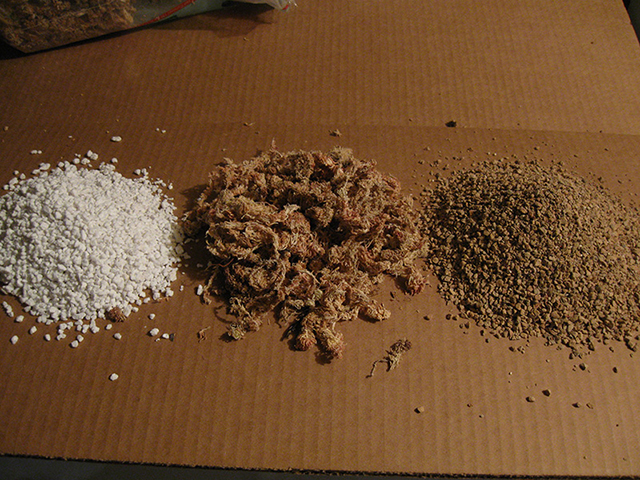
fig. 2
In addition, this mixture is also practically void free. Young divisions have little
problem rooting into this mix.
One disadvantage that I have noticed is if this mix is used with hard water, mineral deposits will
eventually accumulate in the APS. This can result is the formation of unsightly mineral salt build up
that may reach toxic levels over time.
Pots
Heliamphora will develop a quite extensive root system (Fig. 3). This is a case where bigger is better. I have most of mine in large, 6×6×6-inch pots. I have noticed over the years that Heliamphora dry out much faster when root bound. I know of good growers who have lost prized specimens due to this issue.
Water
Heliamphora do not seem too picky about water quality. I believe that 0.00 ppm water is neither natural nor desirable. I prefer a purity level for Heliamphora somewhere in the range of 10-20 ppm. In the past, I even routinely watered my Heliamphora with ¼ strength orchid fertilizer with good results. I feel it is very desirable to water frequently using top watering or some method that allows thewater to drain through the substrate. Whichever method you use, when the water drains from the pot,a negative pressure zone is formed behind it. Fresh air is then forced into the root zone by the atmospheric pressure. This results in a more complete gas exchange and the prevention of any anaerobic conditions.
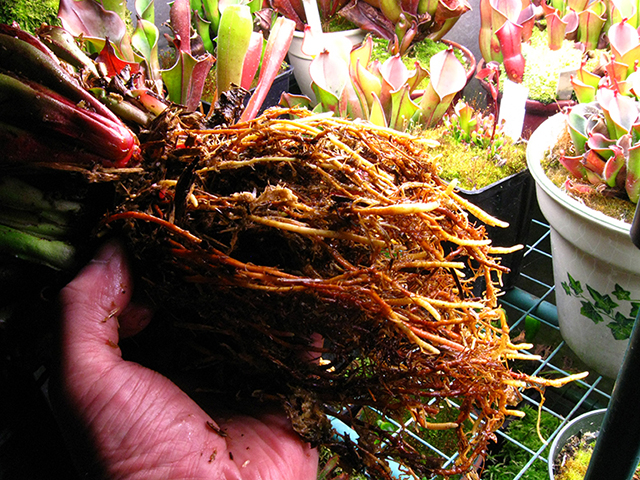
fig. 3
My automated watering system fills the top chamber first. Once the water level is about 0.5 cm below the plant surface a drain cycle begins. The drain cycle then empties the top chamber and fills the lower chamber and the process continues. Watering frequency will be determined by your substrate choice, air circulation, lighting, plant growth, etc. What works for one grower may not work for another. Heliamphora are found in situ growing in areas having very high rainfall amounts, and are often photographed standing in water. It should be considered that the water they are standing in is fresh and highly oxygenated from frequent rainfall. When you repot, if you notice the substrate smells bad, that is an indication you have issues with your watering regime and substrate choice. Personally I use an automated, recycling watering system which operates every other day. My water reservoir also contains airstones. I feel this more closely mimics the oxygen saturation levels of natural rainfall.
Lighting
Currently, my lighting format of choice is fluorescent T5 fixtures. I have tried bulbs with color temperatures of 4100 K to over 6700 K. I seem to get the best overall performance from 5000 K bulbs. I feel with good quality bulbs the performance differences are minimized. My current bulbs of choice are a mixture of Giesemann’s Aquaflora© and Midday© bulbs. I typically use bulbs for two to three years before replacing them. One of the major advantages of the T5 format is their excellent lumen maintenance level. I have found the reflector used can make a substantial difference in the performance of the lighting. Two thirds of linear fluorescent bulbs are pointed in the wrong direction. A good reflector design can recover most of this lost energy. Look for fixtures with individually faceted or directional type mirrored reflectors. I try to keep my plants within a few inches of the bulbs (Figs. 1, 4, 5). However, I feel that there is a point of diminishing returns. Being too close reduces the effectiveness of the bulbs adjacent to the one directly above the plant. The typical running temperature of a T5 bulb is over 65°C. You must prevent the plant from making contact with the bulb. I use cross ventilation and evaporative cooling to help maintain proper temperatures. This will be discussed in more detail later. My summer time photoperiod is 18/6 and wintertime is 12/12. With Heliamphora, an argument can be made about the need for any seasonal change. My observations indicate it has no effect on the plant flowering cycle and no dormancy period is required.
Temperature
As a rule of thumb, the higher the temperatures the more difficult Heliamphora cultivation will be. I can tell a difference in my plant’s overall health when temperatures exceed 24°C for extended periods.
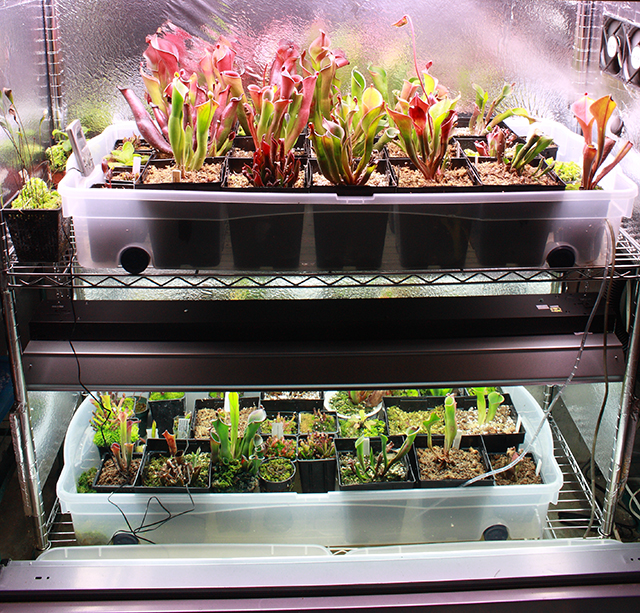
fig. 4
It has long been thought that one of the conditions related to outbreaks of “Heliamphora Sudden Death Syndrome” are temperatures exceeding 26°C. I have never had any significant diurnal variation, but I do have seasonal. My summer temperatures average in the low 20°C. and my winter temperatures will average in the low 15°C.
Cooling and Humidity
To help maintain proper temperatures I use two, low velocity fans (Fig. 6). Each is powered by an individual power supply on the same timer as the light. This provides a level of redundancy if one fan or one power supply fails. This is critical in my opinion. Enclosed plant racks illuminated by four- or six-bulb T5 fixtures will reach critical temperatures if your only source of ventilation was to fail. Using such redundancies has saved my collection more than once. Fans are placed on one end of the plant rack, blowing just above the pitchers and just below the light fixture. You do not want to cool the bulbs, but form a region of cool air between them and the plants. T5’s are designed to run hot and any cooling of the bulbs will reduce their output significantly. Increasing airflow will also result in a significant drop in relative humidity. To counteract this drop, some type of supplementation is needed. Heliamphora can be grown in moderate humidity levels, but for optimum growth and nectar spoon development you will want to supplement. In my system I use an ultrasonic humidifier. Its “fog” outlet is just below and to the center of the two fans. This placement assures its output is thoroughly mixed into the airflow. The evaporation of the mist from the humidifier also provides additional cooling capacity as well as the increase in humidity levels. The humidifier is also on the same timer as the lights and fans. Everything runs when the lights are on and the cooling demand is the greatest. This system works extremely well in my moderate ambient conditions.

fig. 5
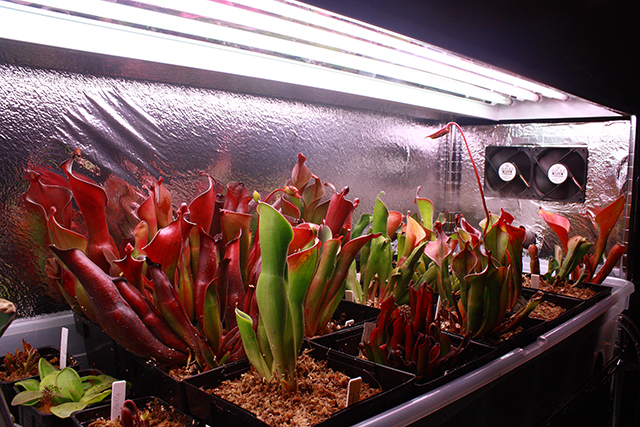
fig. 6
Fertilization
Heliamphora do best with routine fertilization. I used to root feed once a month with ¼ strength orchid fertilizer. This method resulted in good growth, but I didn’t like the side effects. One result was an abundance of “carpet moss”. This undesirable moss would form a layer so thick it had to be removed on a regular basis. Another negative result from the fertilizer is the suspected detrimental effect a nitrogen-rich environment has on Trichoderma atroviride. It is commonly thought that nitrogen-rich environments result in a reduction of the Trichoderma’s beneficial phytoantagonistic characteristics.I now feed the pitchers directly with Hikari© Cichlid Staple, medium-sized fish pellets. This seems to give me the same performance as the root feedings, but without the negative side effects. Occasionally, I will also give the pitchers a diluted fertilizer mix. I typically prefer this route when rooting new divisions or nursing a damaged plant back to health.
Trichoderma
Trichoderma spp. are beneficial fungi that form a symbiotic relationship with the plant. This relationship increases nutrient uptake, enhancing growth, and attacking phytopathogens. When I first started growing Heliamphora I had what I felt were excessive losses from what appeared to be “Heliamphora Sudden Death”. HSD has been shown to be a fungus that can remain dormant until the plant is weakened or stressed at which point it becomes active and plant’s death soon follows. Since I started using Trichoderma, losses from HSD have so far been non-existent. I initially experimented with various species, strains, and products and found Ampacbiotech.com’s products to work best for me. It is a Trichoderma blend with their proprietary strain of T. atroviride being the primary species. To gain the most benefit, Trichoderma should be used routinely. While Trichoderma does attack fungal pathogens, the pathogens’ growth rate may exceed that of the Trichoderma. This makes maintaining a healthy culture critical for peak performance. I use a monthly drench and soak new divisions overnight prior to planting or shipping (Fig. 7). There are many peer-reviewed research papers on the effectiveness of Trichoderma; I encourage anyone interested in learning more to do further research.
Taking Care of New Divisions
When receiving new Heliamphora, their roots are usually damaged and sometimes nonexistent.This poses the problem of desiccation due to transpiration and evaporation. In other words, the plant’s water loss exceeds water intake and desiccation occurs. If severe enough, the damage will exceed the ability of the plant to recover. This process can occur in as little as a day. The plant will look shriveled up and dry; it is easily recognized once the damage occurs.The first thing I like to do with a newly arrived division is soak it overnight in a Trichoderma solution (Fig. 7). This assures me the plant and roots are fully hydrated, inoculated, and ready for repotting. In this state any further damage is reduced as much as possible. After potting, covering the plant (“Bagging”) (Fig. 8) and pitcher feeding with a diluted fertilizer mix are recommended practices. This helps nurse the plant until the tender roots recover and new growth is observed. We want to keep the humidity levels high, airflow low, and temperatures reasonable. Then we slowly acclimate through a gentle introduction into the new environment. This can be done by slowly increasing the plants exposure to its new environment. Common methods include cutting the corners of the bag or poking holes in them over a period of two to three weeks
Dividing Your Heliamphora
Some species of Heliamphora almost divide themselves, whereas others form tight clumps with all their roots coming from a central mass. The day prior to dividing, make sure to water the plant well. It is necessary to make sure everything is hydrated and flexible as possible to limit damage.
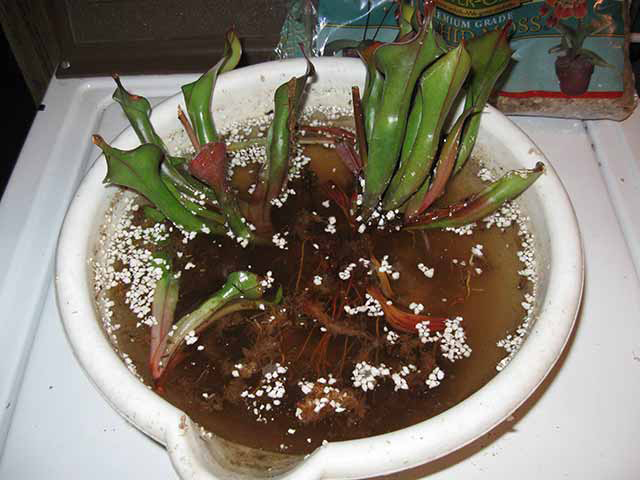
fig. 7
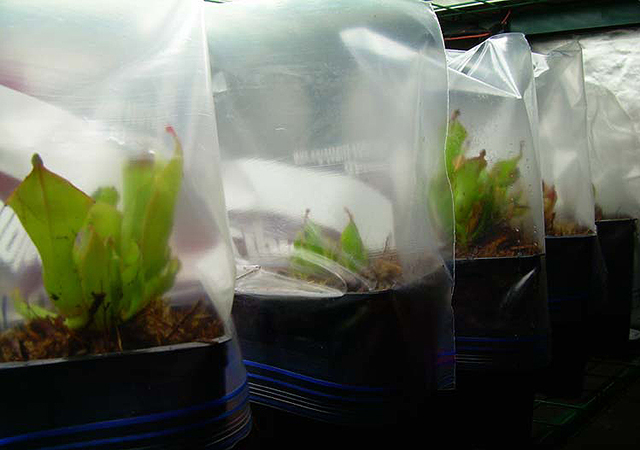
fig.8
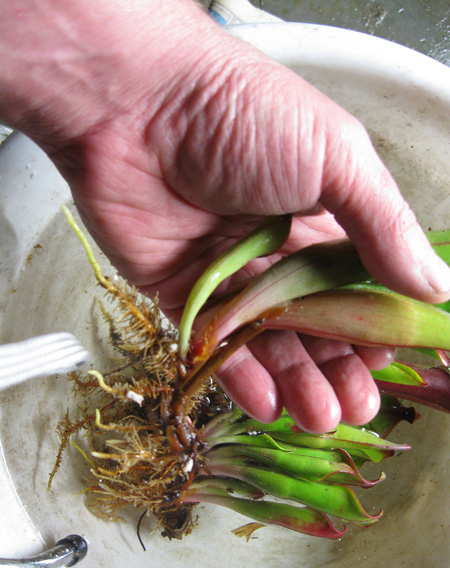
fig.9
I start by unpotting the plant and placing it in a container of water. I then gently tease any remaining substrate from the root mass. Look for the plant’s natural division points (Fig 9). If it is one of the specimens easy to divide, this will be obvious. Gently work the division free from the main clump, and work its roots free from the main mass. Typically they separate with just a little effort and force. I find it is best to do this with the root mass submerged in water. If it is one of the specimens difficult to divide, getting divisions with roots will be much less likely. In that case, sometimes the best that can hope for is a division with a good chunk of rhizome at its base. These are easy to root using the methods already described.
Acknowledgments: A special thank you to Crystal Morgan and Ron Lane. Without you this article would never have happened.