My techniques for the indoor cultivation and propagation of Heliamphora.
Harvesting Pollen
Introduction
If you read the historical references to the harvesting of Heliamphora pollen you will find all kinds of wild and strange beliefs. In actuality, the process is typically easy and predictable. However, there are three main factors that prevented most hobbyist from being successful.
- The timing of pollen release
- The mechanics of pollen release
- The effects of environmental influences
The timing of pollen release
Evolution has engineered the Heliamphora flower in a couple ways to prevent self pollination. The primary method is by timing. The anthers will only release their pollen after the stigma is no longer receptive.

fig.1
When the flower first opens, the anthers are perpendicular to the Pistil and a greenish in color. The pistil is also fully exposed (fig 2).
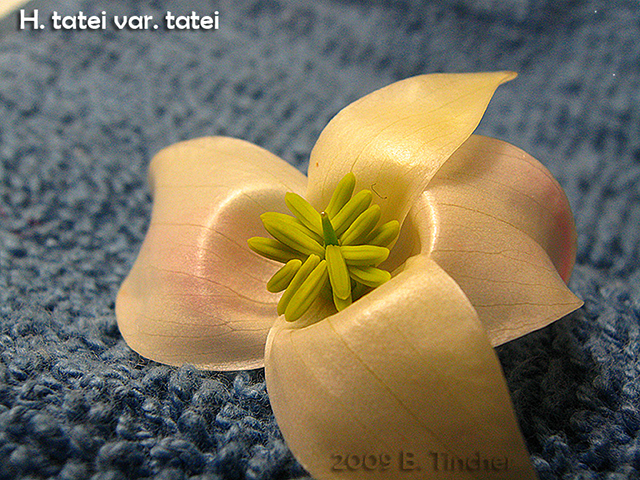
fig.2
After a few days the anthers begin to move. They start to become more parallel to the pistil and move down toward the stigma. They also begin to change color from a greenish hue to a more of a "banana yellow" (fig. 3).
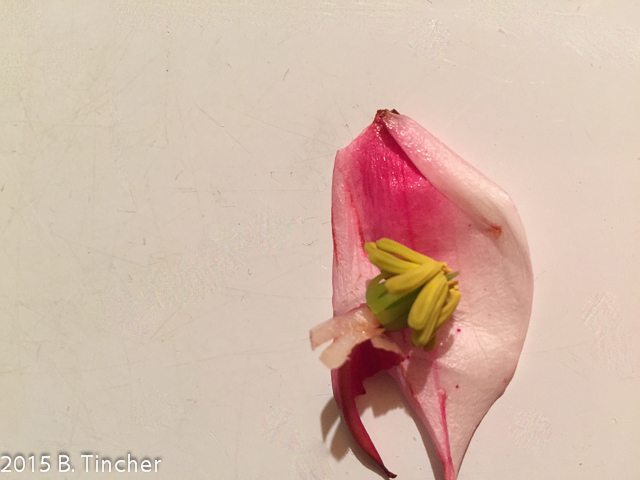
fig. 3
When the anthers are almost completely yellow, with just a hint of green at their base where they join the filament, the timing is right to harvest.
The mechanics of pollen release
Heliamphora pollen in-situ is transferred from one flower to another by insects. I believe it is a species of bee but don't quote me on that. When I was researching this bee species I found a reference that stated a tuning fork with a frequency of 250hz was shown to work for a similar application. I looked on eBay and while I didn't find a 250hz, I did find a 512hz for under 10USD that worked just fine (fig. 4).

fig.4
When the fork is "rung" and contact is made with the anthers they immediately release their pollen. I usually place a mirror under the flower to catch the pollen (fig. 5).
Growers of distinction friends of mine Jennifer Lei and Mike Wilder have modified the method a little. They remove the anthers and hold them directly over the centrifuge tubes while applying the tuning fork.
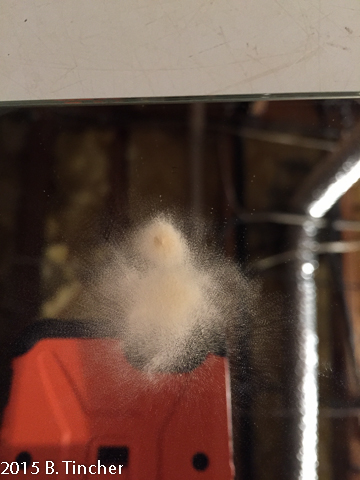
fig. 5
If the pollen is not to be used immediately, simply scrape from the mirror into a prelabled centrifuge tube (fig. 6)
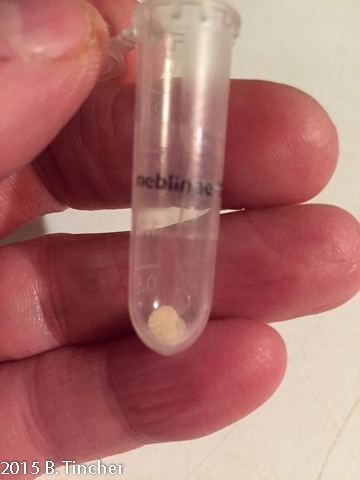
fig. 6
Empirical evidence has shown that the shelf life of pollen is limited to a couple weeks when stored in typical, open air conditions. It is my belief that moisture content has a negative effective on viability. As a countermeasure, I place the open containers of pollen in a tub of silica desiccant. I close the tub and leave in the refrigerator for a couple of days. (fig 7)
After being dried with the desiccant, the centrifuge tubes can then be closed and refrigerated or frozen for long term storage. I have successfully used pollen in excess of 12 months old that was prepared and stored using these techniques.
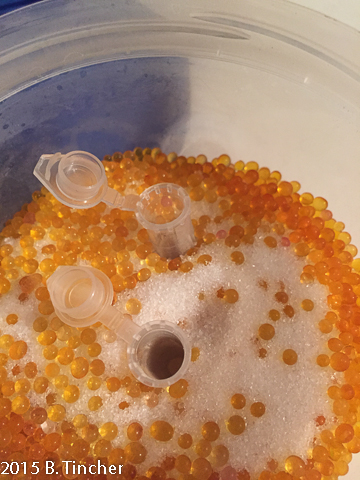
fig. 7
When shipping pollen, my preferred method is to vacuum seal the centrifuge tubes (fig. 8)
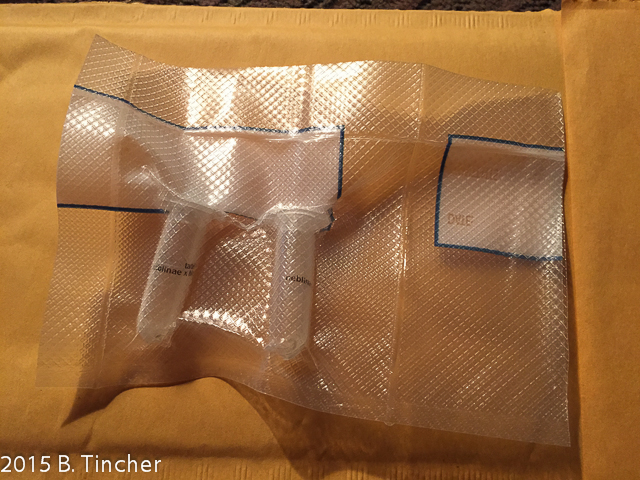
fig. 8
The effects of environmental influences
If your timing is correct but you still have low pollen harvest rates, the likely issue is excessive humidity. Heliamphora flower during the "dry" season and while the pitcher's microenvironment maintains a high relative humidity, the humidity at the flower's height is considerably lower.
Try cutting the flower (or anthers) and allow them to dry overnight in a lower humidity environment prior to attempting harvesting.
Excessive humidity can also interfere with the opening of the petals. When the flower first develops, the filaments and anthers are parallel to the pistil. As the flower develops the filaments become perpendicular to the pistil. This in effect forces the petals open much like an umbrella. If the humidity is excessive the petals may be sticky and may not open correctly. If you observe this condition, you will have to adjust your growing conditions to compensate. Some species have nectaries on the petals which increase the likelihood of this condition, even in modest humidity levels.
The normal developement cycle is: initially the filaments are parallel, then perpendicular (petals open) then parallel again and then the anthers ripen.
Much of this is learning by doing. Now you should know what to look for, when to look for it, and what to do when you see it.
HTH's